

Setting up Govalo - Govalo Support Center
Setting up Govalo
Welcome to Govalo! You have decided to take your digital gifting offering to the next level, so follow the steps outlined below for an initial setup of a gift card through our app.
While logged in your Shopify store, get the Govalo app from https://apps.shopify.com/govalo
Click Install app to accept the permissions and get Govalo installed:
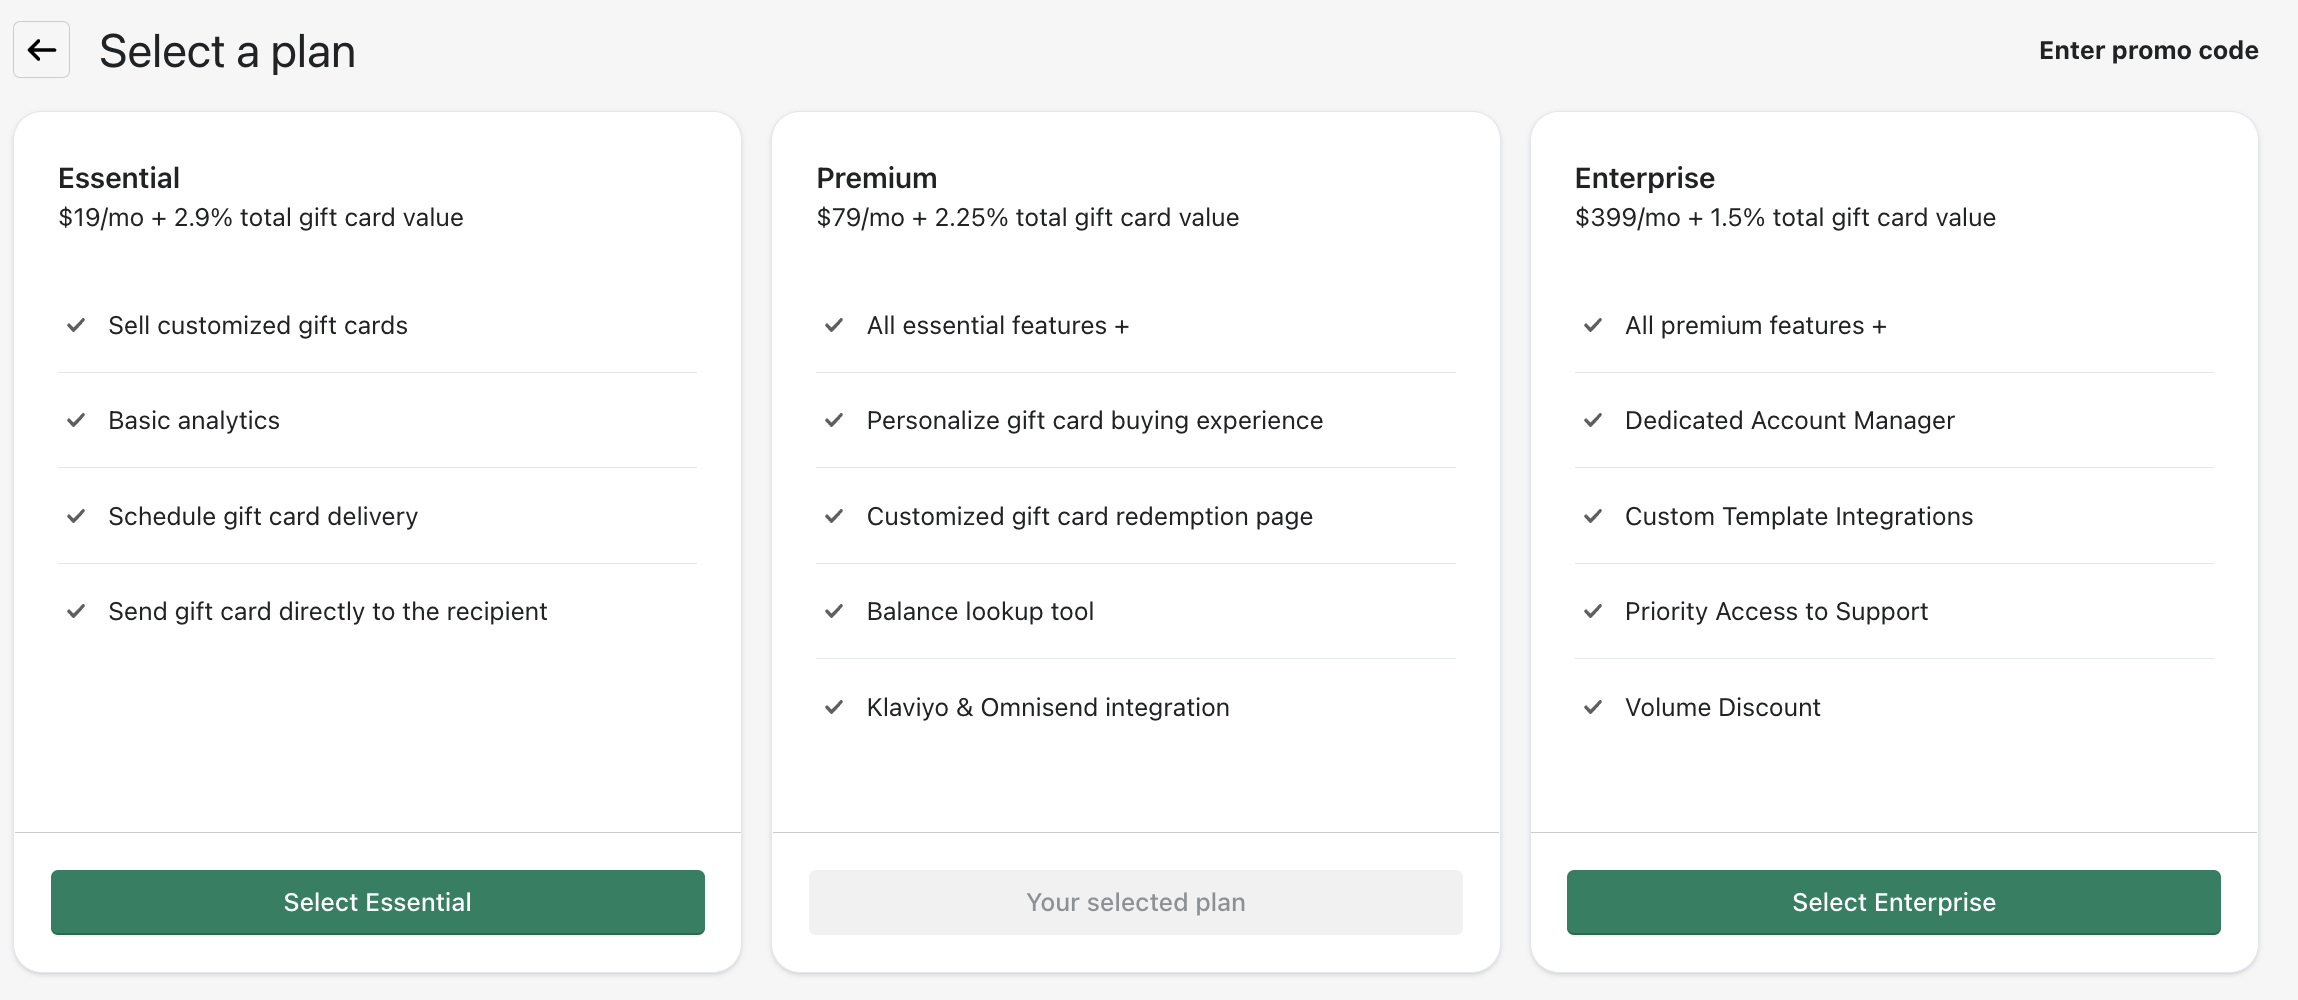
Read the features included in each plan, and select the one that better suits your needs. Every plan comes with a 7-day trial period, so you won't be charged during that time:
You can read further about Govalo's pricing at: https://govalo.mantledocs.com/how-much-does-govalo-cost-govalo-support-center
In the next screen, add your billing details and click Approve.
Next you'll start setting up your first gift card. Start by selecting one of the images offered by Govalo, or upload your own custom image:
In the next step, set your gift card title and description as you wish — you can edit this later at any time.
Moving on, set the values you wish to offer for your gift card. You can add any values as you want, as well as remove the ones that come pre-filled by Govalo. Continue to the next step once you've set your gift card values - you can also edit this later as needed.
Govalo will create your gift card, after which you'll reach the final step
Before you finish setting up Govalo, make sure our app theme extension is enabled. For this, on your Shopify store, navigate into Online Store > Themes, and click Customize on your active theme. After this, navigate into Theme settings > App embeds, and make sure to toggle Govalo on, then Save your settings. You may refer to the images below for a visual of these steps:
Back to Govalo's onboarding screen, click Continue to final step - you'll be taken to a list with some additional details about Govalo, after which you can click Let's go! to be taken to the app.
Related Articles